
February 14, 2025
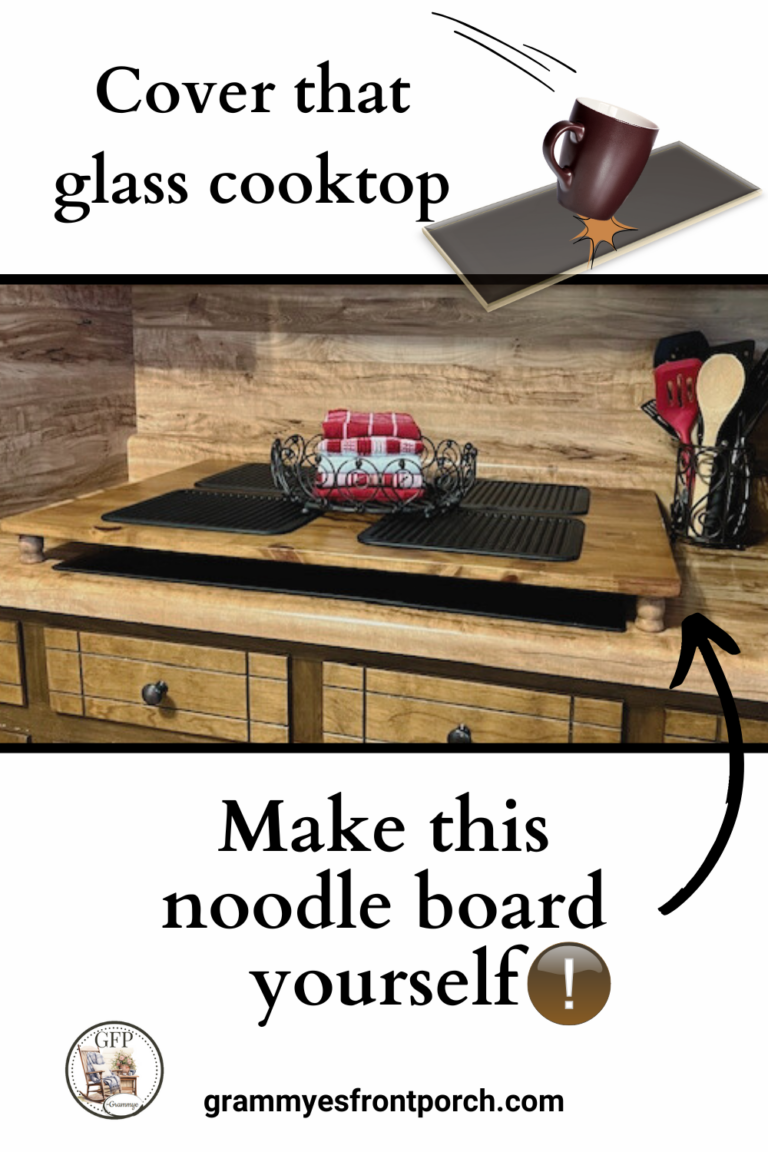
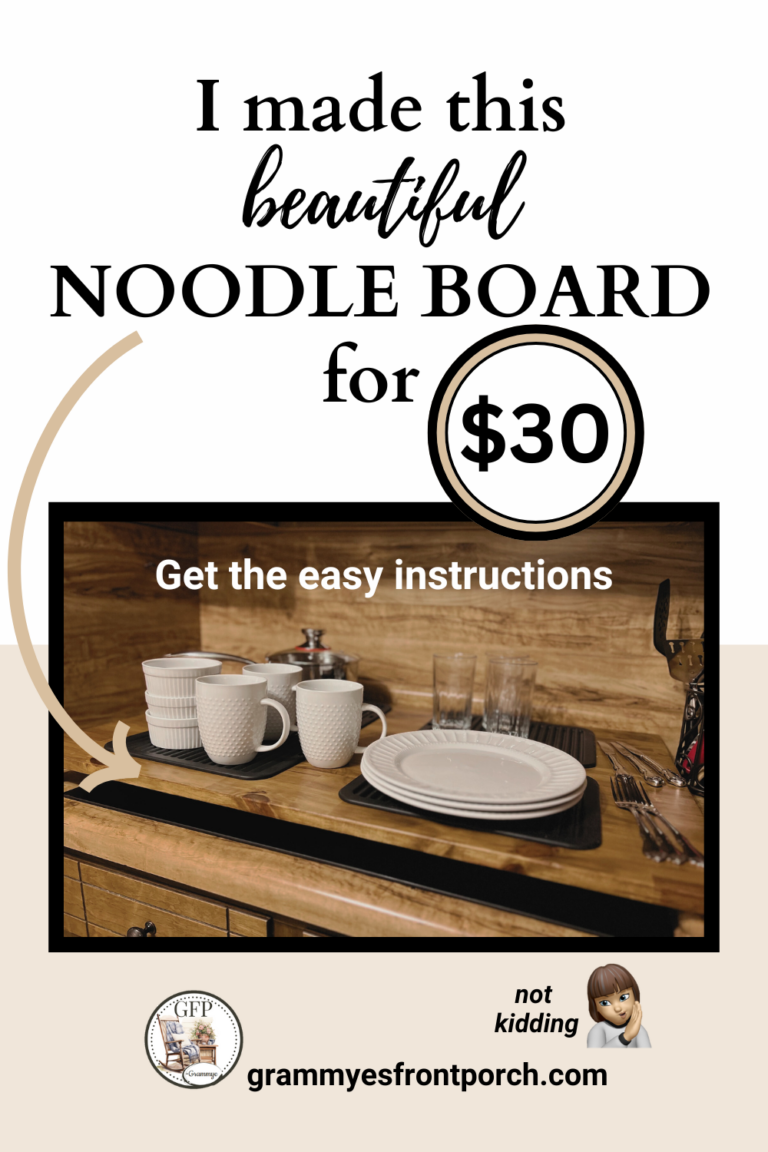
If you found this page because you’re looking for a DIY noodle board, you’re at the right place.
If you don’t even know what a noodle board is, you’re still at the right place. 👉🏻 Because now you can find out.
WHAT IS A NOODLE BOARD?
This popular item is a wooden board that covers a cooktop and extends your counter space. It’s especially useful to protect a gas or glass cooktop.
But there’s a big question: What do noodles have to do with it?
It’s kind of… history.
For those who make their own pasta, it provides a large surface to work the dough. To be honest, it sounds slightly deceptive to call mine a noodle board. Because I have never made a noodle in my life. These boards were always common for pasta makers, but now people use them for a completely different purpose.
What’s the big deal?
It’s used to cover the cooktop. It helps to keep the cooktop clean, protects it, and gives you a little more surface to do things that aren’t cooking. And you can make a “style statement” in your kitchen.
Some adore these, some have found mixed information about the history, some warn against them. Saying things like… you don’t want to cover a gas stove because of fumes. (So if you have a gas stove, maybe look into that. Gas at our house doesn’t come from a stove.)
WHY DO I WANT A NOODLE BOARD?
Because I got a new glass cooktop.
And I was terrified I would break it.
Everyone had a story about something falling onto the surface of theirs, a coffee mug, an iron skillet, etc., and shattering it.
Shattered. That is a scary word. 😬 I don’t want to shatter anything.
I wanted this new fragile thing to be protected from me, since I tend to get a little heavy handed in the kitchen. Maybe you cook like a normal person. Around here, everyone knows the kitchen is like a construction zone. “Put your hard hat on if you’re passing through; Grammye’s cooking.”
I was starting to lose sleep about the many ways I could shatter 😬 this pricey new appliance. What was I to do? Cover it with a blanket? Hire a more gentle person to perform my kitchen tasks?
It didn’t take long to find an answer: The popular solution is to get a noodle board to span the entire surface.
It is a perfect solution, and I’m about to show you.
The good news: Now my nightmares could end. And yours may be beginning. Because…
I’m about to show you my 1980’s kitchen.
It’s so 80’s that I included a warning. ⚠️
(And I’ll give you a peek at the noodle board.)
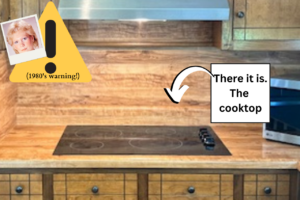
😄 Take a deep breath. Let it out. And return to the current year.
People who have this style kitchen show it only in “before” pictures. I know.
Sure, we could remodel the kitchen. It would be so beautiful. But sometimes I think just maybe it will be in style again, like my flare-leg pants.
Besides. This is the last kitchen appliance to be replaced. (Barely beating the washing machine in the door.)
Now everything works just fine. And honestly, I’d rather go to the beach ten times than tear into my kitchen for a cosmetic update.
DECIDING HOW TO GET A NOODLE BOARD
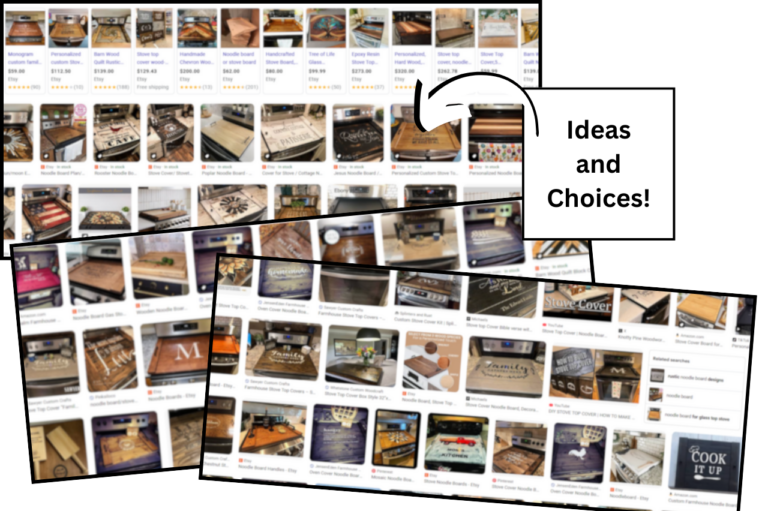
I looked online and saw absolutely beautiful boards, finished with monograms or engraving, personalized, pretty handles, anything you could want.
Except I was very particular about mine. I wanted it to be a little raised, maybe on legs, so it didn’t impact the knobs that stick up from the cooktop. I wanted it to be wider than the cooktop, so I wouldn’t “shatter” 😬 it with the very thing I was using to protect it.
Most of the ones I could purchase were flat on the bottom. Many had handles on the top. Pretty, but I wanted mine completely smooth on top.
So, to sum it up:
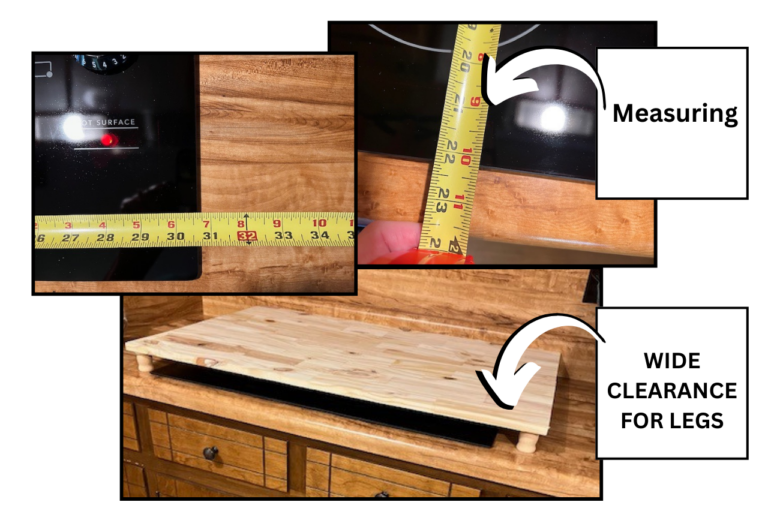
Here’s what I needed: A 22 x 36 inch board that was raised at least 1 ¾ inches, with the side supports resting on the counter, not the cooktop. Sounds pretty standard, but it wasn’t easy to find.
This size would be exactly what I needed. Just narrower than my countertop (22″ front to back), but would completely cover the glass cooktop (36″ from left to right).
36” is big. Bigger than you think. Especially when you take that thing off the cooktop to cook a meal. I mean, where do you put a 3-feet-long-2-feet-wide board? (We’ll get to that.)
Just to be clear, my cooktop is installed on the counter. I have a wall oven that is completely separate. I don’t have the single appliance that has the cooktop and oven combined. But the method I’m showing you could work for yours if you do have a drop-in or slide-in range.
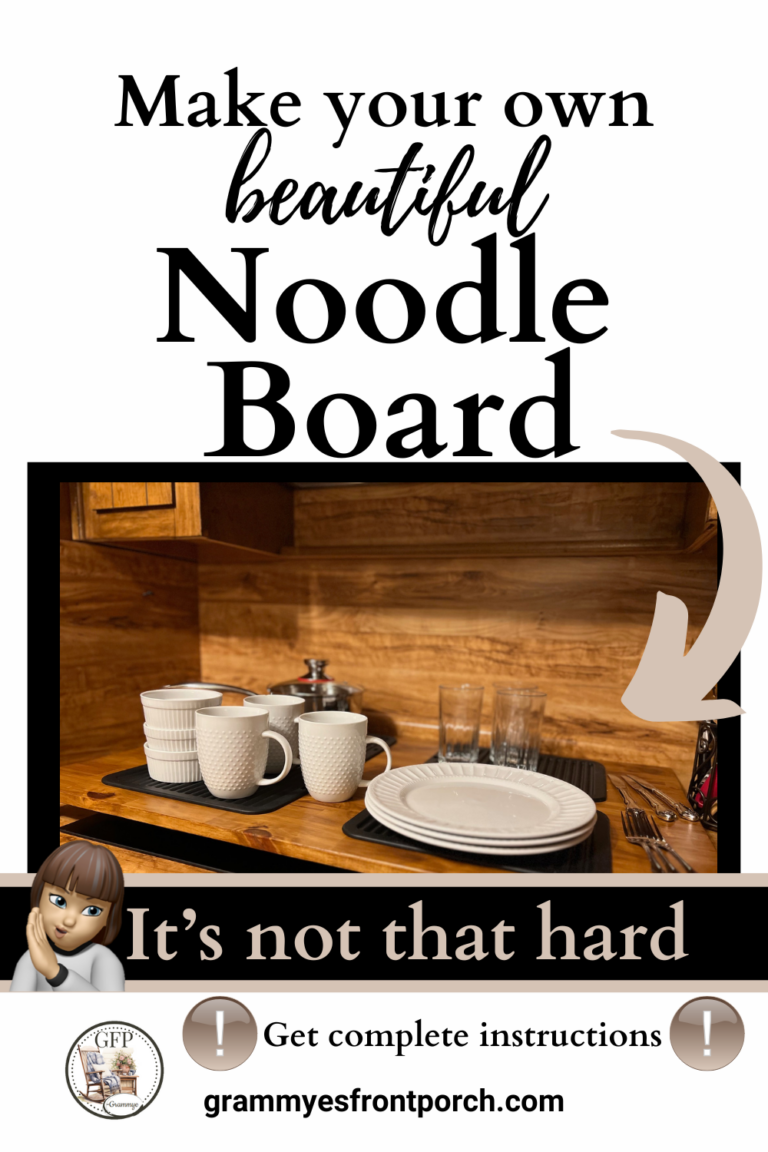
MY DIY NOODLE BOARD
So I went to Lowes. 💖 I love Lowes. So much.
And a lumber customer service man came to offer help. When I described my project, he talked me out of the boards I was about to purchase, and took me to another row in the lumber area.
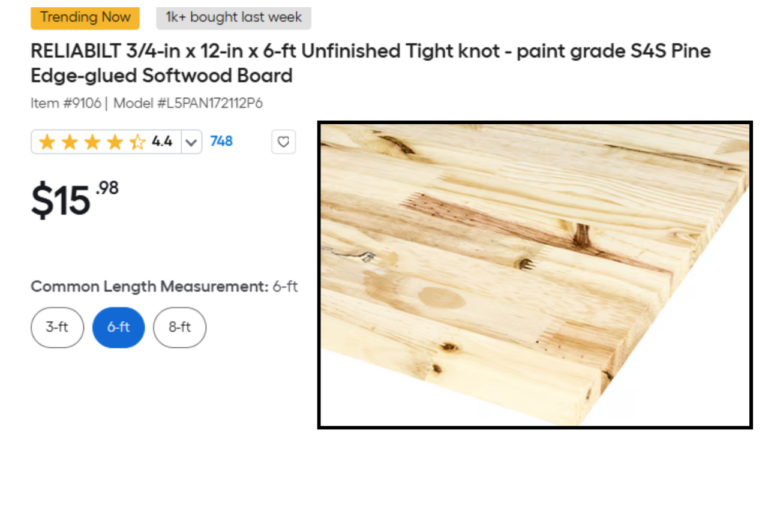
There he showed me this beautiful board that looks almost like butcher block. It’s ¾” thick, and you can see the “finger joints” in the grain where all the smaller pieces were fitted together. The size? 16 inches by 72 inches (6 feet). And he promised me he could make it work for me. I think the whole thing cost just a little over $20. (It comes in other widths and lengths. So look around and find what you need.)
I had my measurements written down, and he cut the board down for me right there in the store, so that two pieces, could be joined together to make the perfectly-sized cover. (There were pieces left over that I saved for another project.)
Exactly how did he cut it?
Imagine that board, 16 x 72 inches (6 feet). He ripped it first, end to end, taking off 5 inches of width along the whole thing, so now it was 11 x 72. Then he cut the board in half, so that each piece was 11 x 36. Side by side, they now formed a 22 x 36 surface that was perfect. (Cutting at Lowes is free when you purchase the board.) The extra parts he cut off are saved for another one-day project.
That’s enough math for a day! Sorry about that.
Now, loaded up with my pieces of wood, I headed home and raided my fix-it stashes, in various places in my dark closets. I’ll tell you all the steps, and I’ll show you the pictures.
Let me show you the product at Lowes. And remember: Wood sizes are called one thing, but may be different on thickness and width. So be sure to measure.
ASSEMBLY OF NOODLE BOARD
I’m not a woodworker, but I do play one at home sometimes.
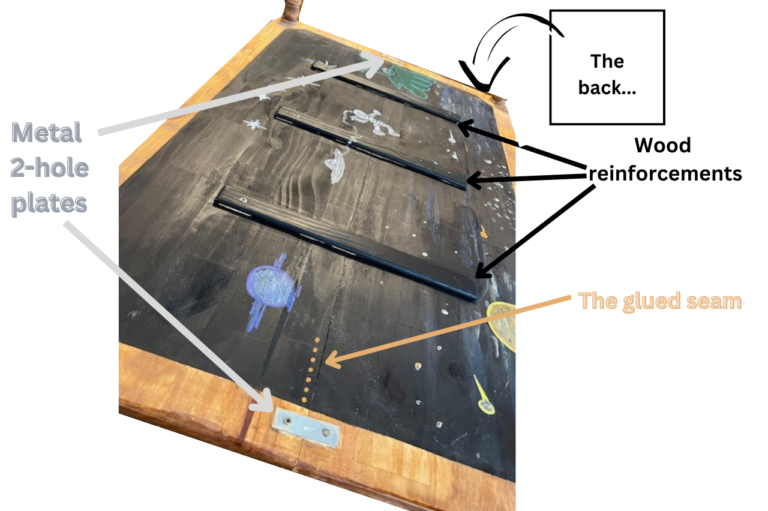
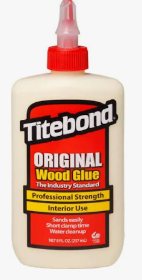
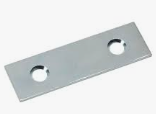
I got out the wood glue, and some little metal plates, and joined those two boards together. I spread a layer of wood glue on the joining edges, then secured them firmly together with the 2-hole plates. The plates were on the back so they wouldn’t show.
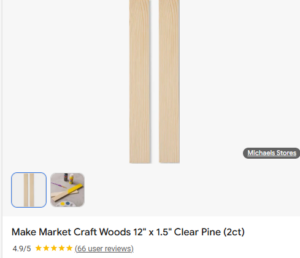
I also had some wood slats from a previous project. They are thicker than paint sticks, but a similar size, about 12 x 1.5 inches. About the size of a wood ruler you’d use for school. I secured those across that seam (also on the back) to give a little more support.
I think you could also use square dowels for this.
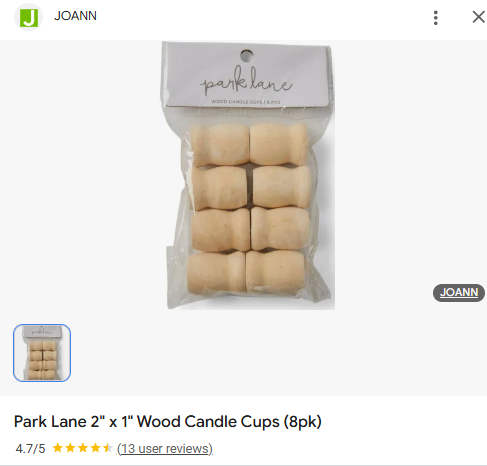
At the craft store I had picked up some wood “legs” that were just under 2 inches tall, about 1 inch in diameter. They are actually candle holders, tiny wooden cups with a solid base. Perfect. These were also placed on the back of the board, one on each corner. So everything I attached is on the back (the bottom). The top is still smooth.
We had carefully checked to be sure the board would be wide enough and tall enough to clear the cooktop.
These things I’m describing were all attached to the back of the board with screws that wouldn’t go all the way through the board. Glued and screwed. I was careful to keep an eye on the project, wiping any tiny oozes of glue before it dried.
And I really will show you all of it. In a minute.
I also used sandpaper to knock down all the edges a bit. It seemed kind of “cornery” before I did that. Just making the edges less sharp, slightly rounded, more comfortable to handle.
The whole thing was now assembled and the glue was dry.
Assembled, Now Time to Finish It
I failed to actually do a video. (I’m sorry.)
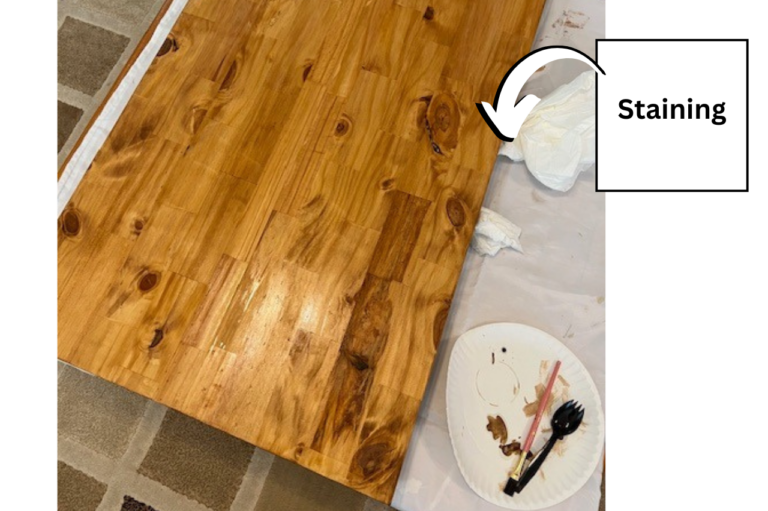
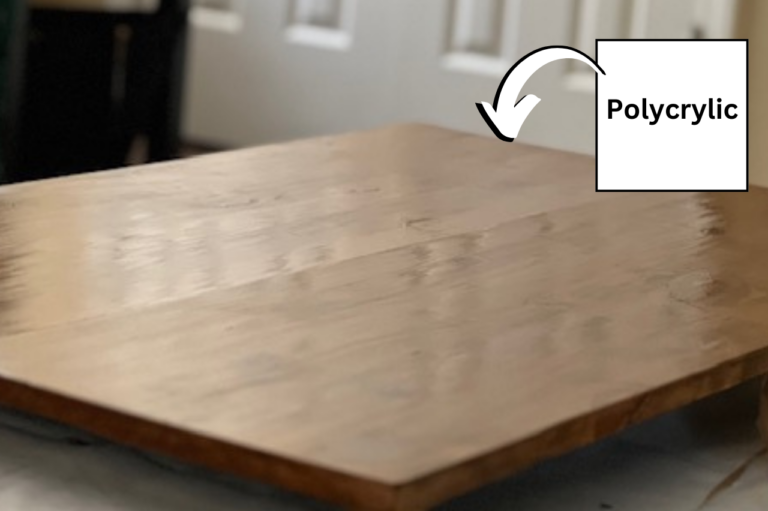
I stained the whole thing, a walnut finish, then applied a couple of protective coats of Polycrylic over the top and sides.
If you were paying attention, you saw “paint grade” in the description of the wood product. But in this case, I took a chance, and the stained project turned out beautifully. They suggest in the description that you can paint or stain. A food-grade finish was not necessary. We don’t use this for any direct contact with food. (And that’s quite enough talk about “grade” since this project wasn’t for a grade.)
Were you thinking paint for the finish? I think a painted board would have also been just gorgeous. And we all have a stash of leftover paint, right? I’d say the finish is definitely the choice of the person who will be using the noodle board.
And Polycrylic is such a forgiving product. It doesn’t yellow like polyurethane. It comes in a matte finish, and just makes everything okay. Brush it on over stain, over paint, whatever you want protected.
Cost for DIY Noodle Board
The board cost was less than $20, including having it cut. Wood glue is about $5. The wood slats, my reinforcements, are about $3 for a 2-pack. I usually get stain at Lowes, Minwax. It’s about $9. Polycrylic is about $15. I already had stain and Polycrylic. The wood “legs” were about $6 for the pack. The metal plates are around $2.
For me, the actual cost was the board ($16) and the legs ($6). I had everything else. It was truly a bargain.
Even if I hadn’t had the other supplies, and had to buy every single thing, it would still have been only about $60 total. The biggest-ticket items besides the board, were the stain and the Polycrylic. I used very little, so these two products are still around for my next project.
It was nice to do it myself. To see it all come together in a way that was just right for my needs. You know that satisfaction, right? When you made something, or fixed something. And you then have what you need and it works.
I’m going to show you everything.
Before I show you the hardware on the back, I need to explain something.
One of the grandboys who loves to paint things overheard the discussion about stain vs paint. Of course he wanted to get out the acrylic paints and decorate this for me. And of course I wanted a beautiful stained board that blended with my kitchen.
😆 Because every 80’s stained wood kitchen needs more stained wood, right?
😳 What would you do?
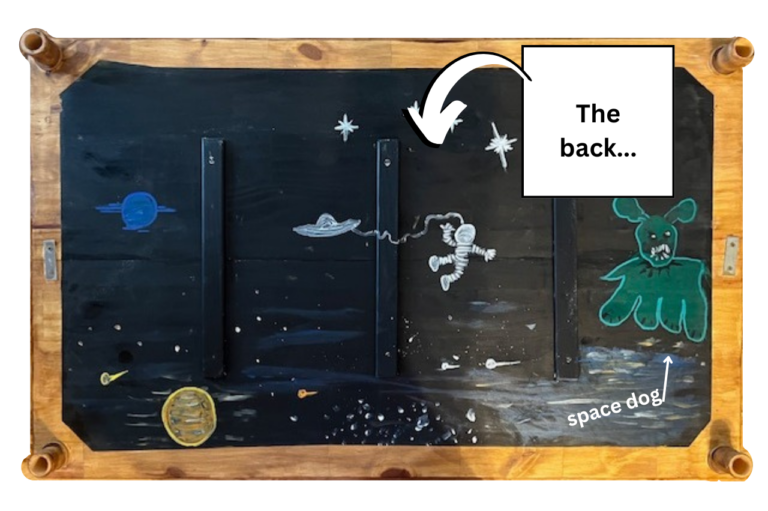
I love painting with him, and he was so excited about helping me make it beautiful. So we decided to do a secret painting on the back (underside) of the board, just the two of us.
I carefully covered the front (or the top, I guess), taped off each edge, and also a margin on the back (the underside), and covered the legs. I left the main part of the back uncovered.
Then we headed out to the porch with our supplies. Together we painted his chosen theme: outer space. Space travelers, planets, stars, and a green space dog.
We talked about how it would be hidden, 😉But we know it is there always.
And I’ll show you our special hidden secret painting, because you read all this long story about my noodle board that will never ever have a noodle made on it. 💖
And you’ll see the hardware that holds it together.
After the artwork was dry, I removed all the protective tape.
Sigh. I just have to pause here.
Honestly GrandDaddy and I couldn’t believe how pretty this turned out. We were just so pleased with the final product. He had actually been really helpful in engineering it.
It was beautiful, the perfect stain color, looking like it was custom made for me. I guess it kinda was.
MAKING THE STYLE STATEMENT WITH MY NOODLE BOARD
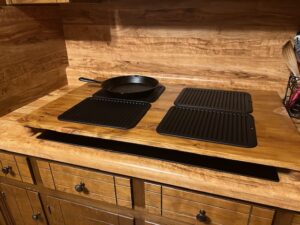
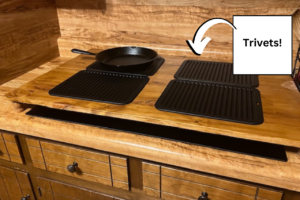
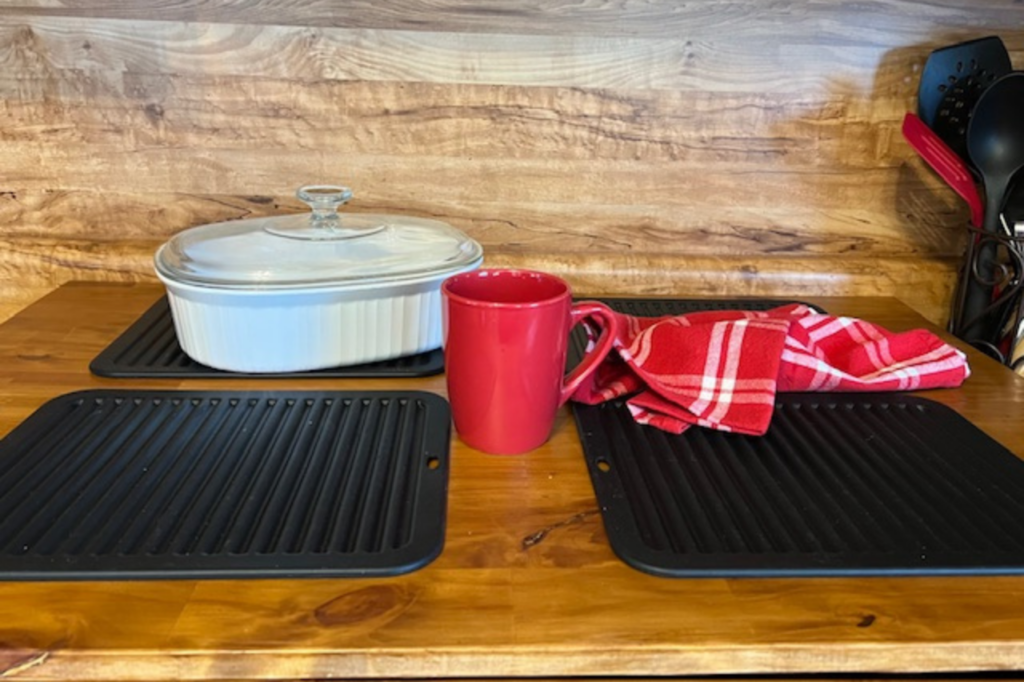
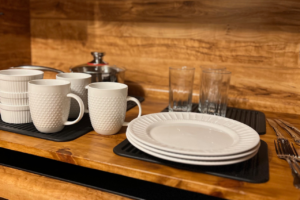
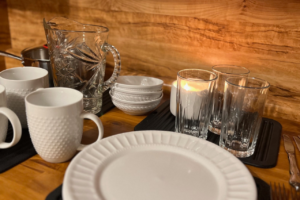
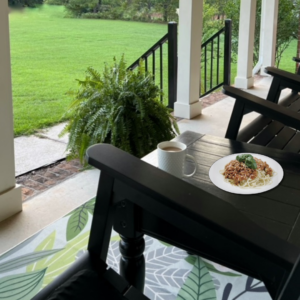
I got on Amazon and found some black silicone trivets. When they were all four placed on top of the noodle board, it almost looked like a cooktop on top of a hidden cooktop!
But what a great place to sit a hot pan out of the oven.
You know what? I actually use this noodle board all the time. And I have not cracked my glass cooktop. I also no longer have bad dreams about cracking it.
YOU CAN MAKE YOUR OWN NOODLE BOARD
I’m showing you all the (amateur) pictures, and I want you to know that it was not difficult to make this. I honestly think most people would be perfectly comfortable tackling this DIY project.
The most challenging part was the engineering. Wanting it to be sturdy and pretty and functional.
And the second most challenging part was something I mentioned a few minutes ago: Finding a place to put the noodle board when it’s time to actually cook. (Cooking is a thing I do my best to avoid, but sometimes I must.)
I prepared a corner counter across the room so that nothing is really stored on a section of it. I can just pick up the noodle board and move it to this section of the counter while I cook. Even then, that space is still useable (the board is still a working surface, just in a different place).
If that area is being used for something else, I can put it on the kitchen table or even take it to the laundry room. I’m telling you ahead of time, because this wasn’t something I thought about until it was finished.
Take a look at the pictures, and see if this is something you’d like to tackle. I really do like it even more than I expected.
If it helps, here are a few of the products I used.
Glue, metal plates, wood slats, and legs.
My method, well, it worked for me. But what if you need something different?
MORE WAYS TO MAKE A NOODLE BOARD
If you are a woodworker, there are many ways to tackle this project.
I actually found a video (Wood Craft Blueprints with Jen) that explained a similar method. She actually does show you step by step, and the finished product ends up looking so pretty, a lot like those I saw online.
Also Paw Paw’s Workshop has a great video that explains a lot about woodworking as he completes his noodle board project. He even shows you how his laser engraver works.
And once you see these videos, you’ll see lots more. If you really do want to make a noodle board, you’ll be able to find what you need.
Thanks for hanging out with me today, and listening to my long story. It’s kind of fun to find little projects that you can actually complete, that make your life easier, and that you can share.
I have loved the “extra” counter space this creates for me. Especially at holidays when we have lots of foods to serve. I hope this inspires you to consider making one for yourself.
There’s something healthy about letting your creative ideas out of your head. Of course it’s satisfying to make something you like. But it’s good for you — thinking about a project, solving problems, and enjoying something pretty.
Remember: We can do a lot of things we thought we couldn’t. Like make a noodle board, or paint a space dog, or start a website, or plenty of other things.
So really be careful about any sentence that begins with “I can’t” (like “I can’t make things”) or “I’m not” (like “I’m not crafty) because 👉🏻 it might not be true.
By the way, 😎
Some of the products mentioned as links on this page are affiliate links. That means a merchant may give me a tiny reward if you buy something I recommended to you. Tiny rewards like that, plus the sale of my own products, help to reduce the ongoing cost of the blog. (Or, as my husband calls it, my expensive hobby. 😉)
Find out more about that here.
Thank you for visiting! At GFP company is always welcome!
 If you liked this topic, feel free to
  share
share  on Facebook or Pinterest, or send a link to a friend.
Are you on Pinterest? That is a crazy fun place! You can find so many helpful things. Take a look at what I’ve saved for you! A lot of things that never make it to the blog. Here are my Pinterest pins, and I have lots of categories/boards if you’re looking for something specific.
-Grammye
New here?
I’m Grammye, and I’m collecting and sharing ideas that can help you embrace the life you have.
When things are difficult, come here to refresh and relax. We’ll have coffee and talk.
You’re invited
to the neighborhood of GFP.
Accept by signing up
and I’ll send you a letter right away.
Subscribing to GFP is just like getting a magazine. Except it’s free! You won’t be asked for any payment information.
So say yes, then check your junk/spam mail in case the confirmation gets lost on the way!
This post may contain affiliate links. That’s a good thing. It means if you purchase a product I’ve highlighted, the seller may compensate me for that promotion. I love to share products that are a good value and make life easier. Those little commissions may add up, and can help to offset the cost of running the blog. Or maybe even create a little income. Click here to learn more about this.